Budget Portable Recording Studio: Step‑by‑Step Guide for Working Musicians

Hook: Ever tried to capture a killer riff on the road, only to end up with hissy‑free recordings that sound like they were taped on a cassette? I’ve been there—my first DIY rig was a mess of cables, a borrowed mic, and a laptop that kept crashing. After a few rough gigs, I finally built a budget portable recording studio that actually works, and I’m spilling the exact steps so you can skip the headaches.
Context: Whether you’re a gigging rhythm guitarist, a singer‑songwriter with a day job, or a session player looking to capture ideas between shows, having a reliable, low‑cost setup can keep the creative flow alive without breaking the bank.
What equipment do I need for a budget portable studio?
You only need a handful of essentials that you probably already own or can snag cheap:
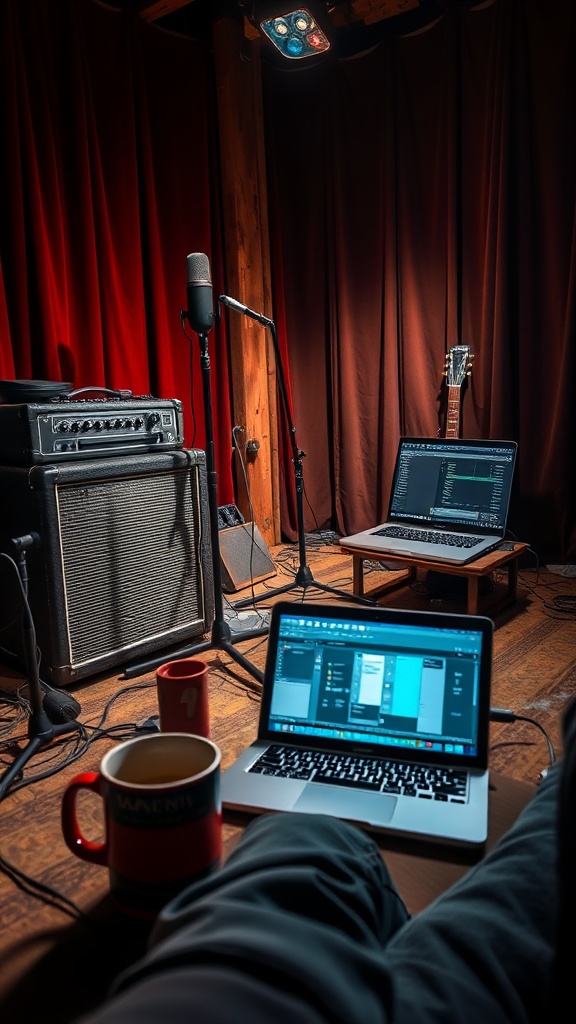
- Laptop or tablet — A modest‑spec Windows PC or MacBook Air (8 GB RAM, SSD) runs most DAWs.
- Audio interface — Focusrite Scarlett Solo or a budget Behringer U‑Phoria UM2 (~$50).
- Microphone — A versatile cardioid condenser like the Audio‑Technica AT2020 or a dynamic SM57 for amps.
- Headphones — Closed‑back for tracking (e.g., Audio‑Technica ATH‑M30x).
- Portable amp or amp‑sim — Small combo amp or a software amp plugin.
- Cables & power — 1/4" instrument cables, USB cable, and a reliable power strip (see our Pedalboard Essentials post).
- Acoustic treatment (optional) — A couple of 12" foam panels or a DIY blanket.
Pro tip: I use a PowerStrip from our Guitar Power Strip Setup guide to keep everything powered safely on stage.
How much should I spend on a home recording setup?
You can get a functional rig for under $300 if you shop smart:
| Item | Approx. Cost |
|---|---|
| Laptop (used) | $150 |
| Interface | $50 |
| Mic (dynamic) | $60 |
| Headphones | $40 |
| Cables & accessories | $30 |
| Total | ≈ $330 |
If you already own a laptop and headphones, the initial outlay drops to $150‑$200.
Can I record quality tracks with a laptop and cheap mic?
Absolutely. The key is proper gain staging and a decent DAW. I record all my rhythm tracks in Audacity (free) or Reaper (affordable license) and get clean, low‑noise recordings. Pair a dynamic mic with a good preamp (the Scarlett Solo’s preamp is surprisingly clean) and you’ll capture guitar tone ready for mixing.
Step‑by‑Step: Build Your Portable Studio
1. Set up your audio interface
- Connect the interface to your laptop via USB.
- Install drivers (if needed) from the manufacturer’s site.
- Open your DAW and select the interface as the input/output device.
- Pro tip: Keep the interface’s gain knobs low and increase the mic preamp until the input meter hits around -12 dB during a loud pluck.
2. Position your microphone
- For amps: place the mic 2‑3 inches from the speaker cone, angled slightly off‑axis to tame harshness.
- For vocals or acoustic guitar: use a cardioid pattern and position 6‑12 inches away, aiming at the sound source.
- Use a pop filter for vocals.
3. Connect headphones and monitor levels
- Plug headphones into the interface’s headphone output.
- Adjust the monitor mix so you can hear both the input and playback without latency.
- Common mistake: Forget to enable direct monitoring; you’ll hear a delayed signal and struggle to stay in time.
4. Record a test take and tweak settings
- Record a short 30‑second riff.
- Check for clipping, background noise, and latency.
- Adjust gain or mic placement as needed.
5. Organize your session files
- Create a folder structure:
ProjectName / Audio / Takes / Mixes. - Label each take clearly (e.g.,
Riff_Take01.wav). - Pro tip: Use date‑time stamps in filenames to avoid overwriting.
6. Back up your recordings
- Use a USB flash drive or cloud storage (Google Drive, Dropbox) for immediate backup.
- For long‑term archiving, consider an external HDD.
What about acoustic treatment on the go?
If you’re recording in a hotel room or a cramped garage, portable acoustic panels can make a big difference. A simple solution is hanging a thick blanket over reflective surfaces and placing a foam pillow behind your mic to reduce room echo.
Common pitfalls and how to avoid them
- Too much gain → distortion. Keep an eye on the input meter.
- Cable noise. Use well‑shielded cables; avoid running power and audio cables together.
- Latency. Lower your buffer size in the DAW (128‑256 samples) for real‑time monitoring.
- Unstable power. Use a surge‑protected power strip (see Guitar Power Strip Setup).
Wrap‑up: Get recording fast, stay low‑budget
You now have a portable, budget‑friendly recording studio that lets you capture ideas anywhere—from a cramped hotel bathroom to a backyard jam session. The gear list is cheap, the steps are simple, and the results are surprisingly professional. Next time you hear a riff in the bar, you’ll be ready to lay it down without missing a beat.
Ready to roll? Grab the gear, follow the steps, and start recording your next track today.
Related Reading
- Road‑Ready Guitar Maintenance: 8 Weekly Tasks Every Working Musician Should Do — Keep your instrument in top shape on the road.
- Pedalboard Essentials: 5 Must‑Have Pedals for Working Musicians — Choose the right pedals for a compact rig.
- Budget Amplifier Showdown: 5 Affordable Amps for Working Musicians — Pair your rig with the right amp.
- Tube vs Solid‑State Amps: Which Is Right for Working Musicians? — Understand amp tone options.
External Resources
- Sweetwater — Audio Interfaces Guide
- Reverb — Budget Home Studio Gear
- MusicRadar — Home Recording Basics
- Sound On Sound — Acoustic Treatment Tips
- Audacity — Free DAW Download
<meta.faqs>
[
{"question": "What equipment do I need for a budget portable studio?", "answer": "You need a laptop, audio interface, microphone, headphones, cables, power strip, and optional acoustic treatment."},
{"question": "How much should I spend on a home recording setup?", "answer": "A functional setup can be built for under $300 if you shop smart and reuse existing gear."},
{"question": "Can I record quality tracks with a laptop and cheap mic?", "answer": "Yes, with proper gain staging and a decent DAW you can capture clean, low‑noise recordings suitable for mixing."}
]
</meta.faqs>
Steps
- 1
Set up your audio interface
Connect the interface to your laptop via USB, install drivers, select it in your DAW, and set gain around -12 dB.
- 2
Position your microphone
Place a dynamic mic 2‑3 inches from your amp cone or 6‑12 inches from vocals/acoustic guitar, using a pop filter for vocals.
- 3
Connect headphones and monitor levels
Plug headphones into the interface, adjust monitor mix for latency‑free monitoring, and enable direct monitoring.
- 4
Record a test take and tweak settings
Record a short riff, check for clipping or noise, and adjust gain or mic placement as needed.
- 5
Organize session files and back up
Create a clear folder structure, use date‑time stamps, and back up recordings to cloud or external drive.